DIY Infant Dresses:
Make a Dress out of a Pillowcase!
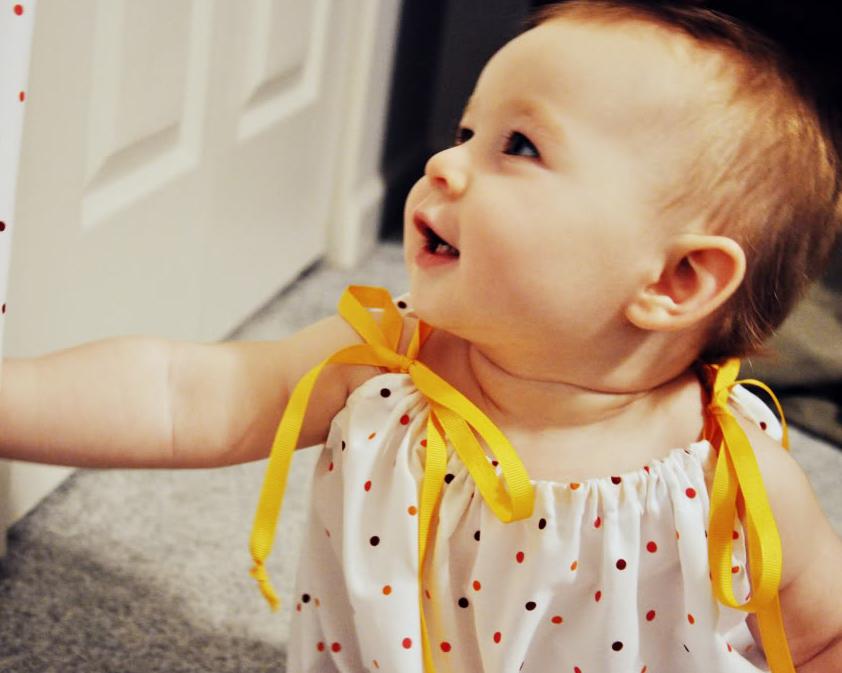
Making infant dresses out of a pillowcase? Yep, you read it right! You can make some super-cute and easy-peasy-lemon-squeezy dresses out of a PILLOWCASE!
Seriously? From a pillowcase?
Let me confess that I am a no-sew person, but like most of us, I love chic infant dresses. So how about this fuss-free no-sew pillowcase dress that will not only make your baby look super-duper cute, but you will feel great as well (who doesn't feel good after a successful DIY job) - a feeling that we mothers often crave.
Things you'll need:
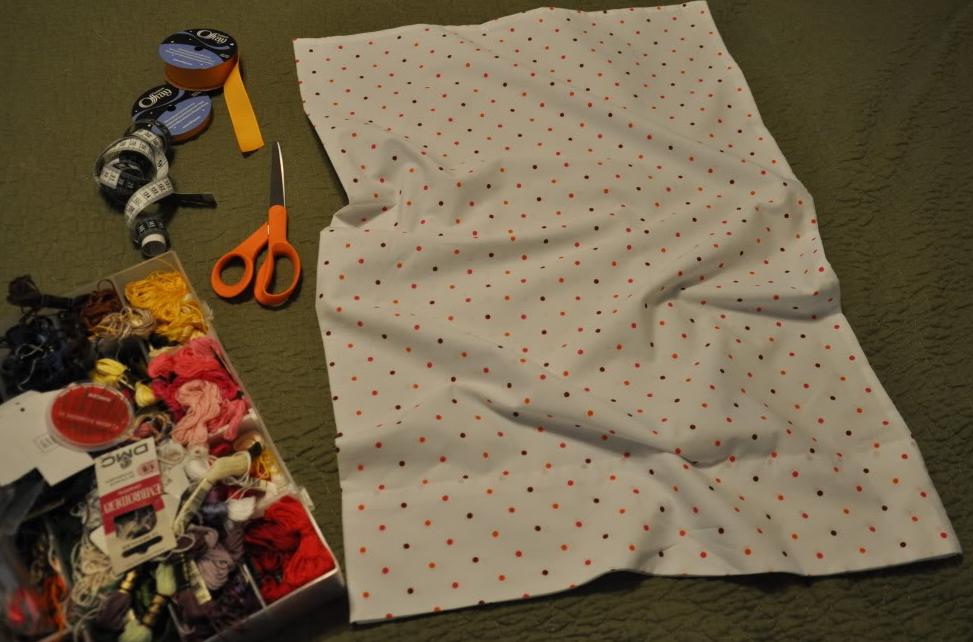
So here are the things that you will need to make this amazing baby girl clothing out of a pillowcase:
- A Pillowcase
- Spool of ribbon (of a color that matches or contrasts with the pillowcase)
- Your sewing kit (scissors, measuring tape, needle & thread)
- An iron
- And...a sleeping baby (otherwise, by the time you finish making it, your daughter would be in high school!)
Let’s begin!
1. Measure the length of your baby to see how long you want to keep the baby dress.
2. Now on a flat surface, spread out the pillowcase flat in such a way that the seam is on one side.
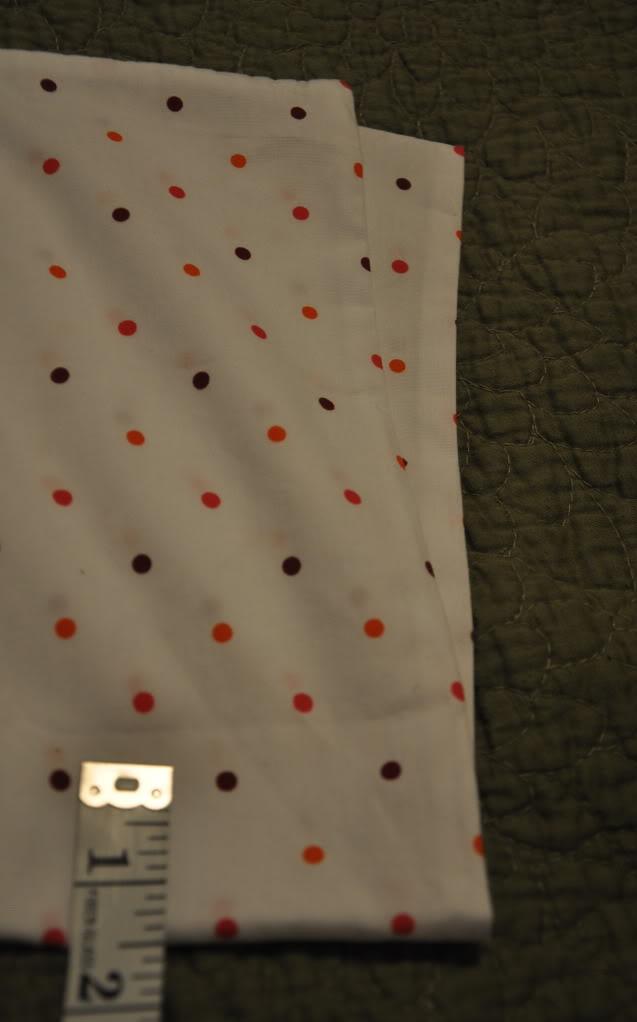
3. Depending upon how long you want the dress, cut the sewn-together end. Remember to leave the stitch margin, i.e., leave a one-inch margin for stitching. This area will make the top of the baby girl clothing.
4. Now fold the pillowcase vertically.
5. To make armholes: Cut an approximately 1.5 inches wide and 3 inches deep J-shape into the folded side. If you are making this for an older kid or your baby is on the plump side, you may alter the measurements a little; for example, make it 2 inches wide and 4 inches deep.
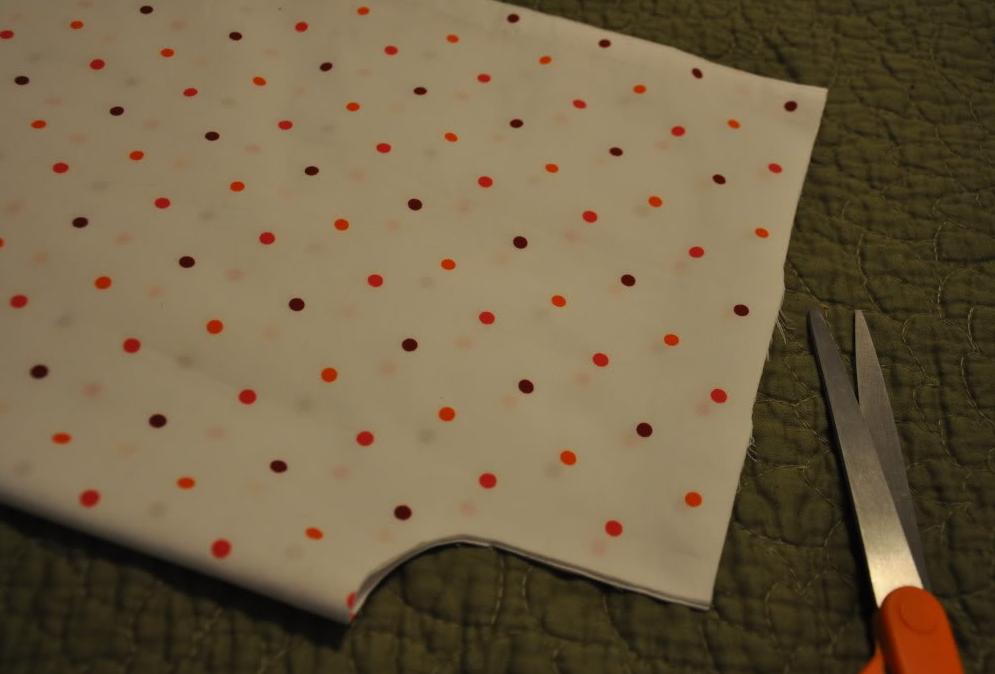
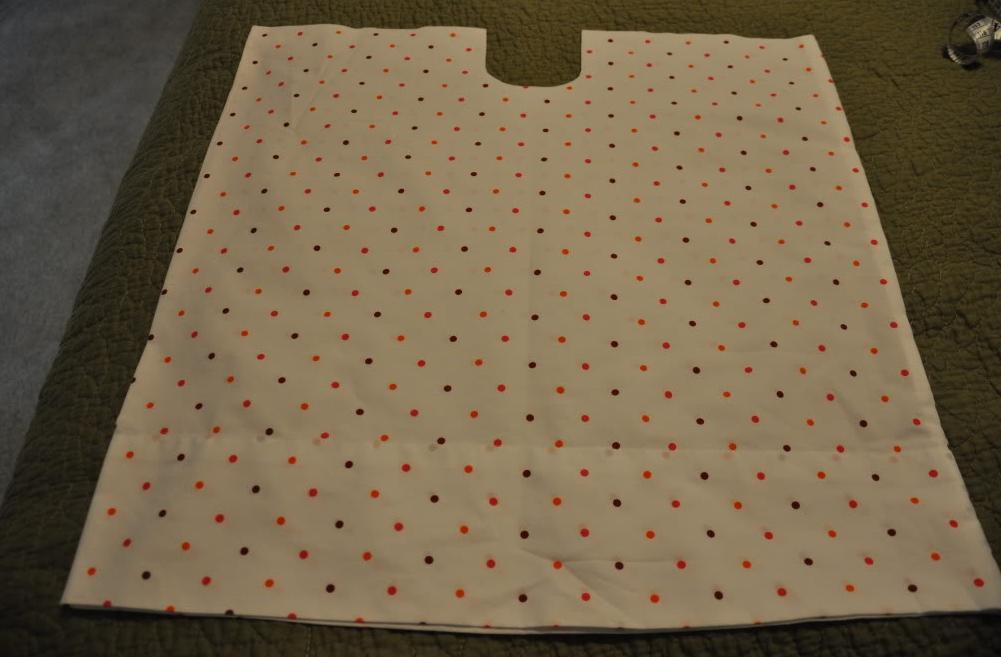 When you unfold, you may suddenly panic as it may seem that you have cut it at the neck side but don’t worry, you are on the right track.
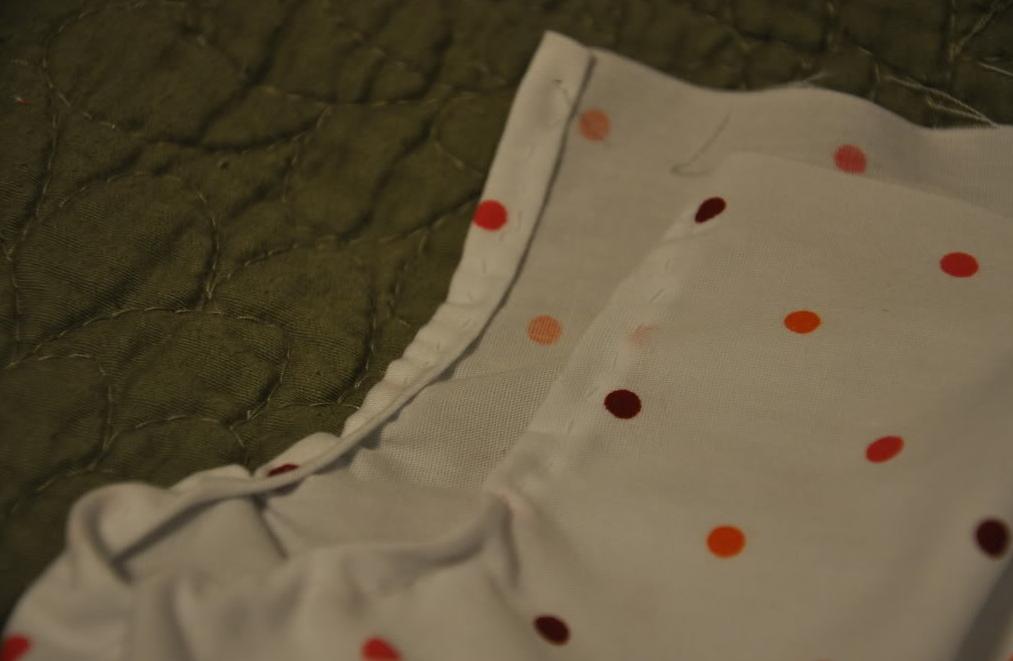
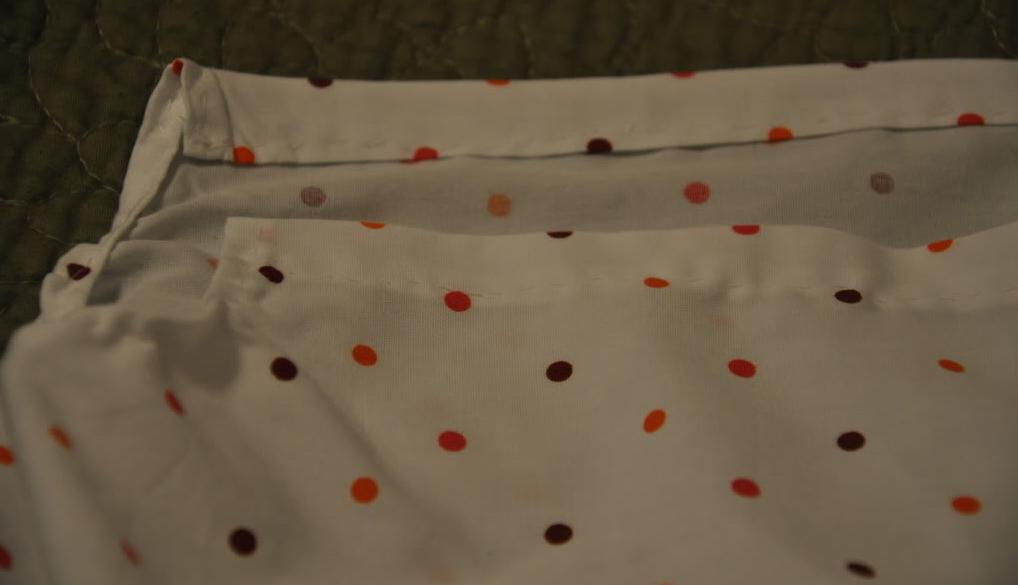
6. Fold it to get the armholes on the sides – this will make the seam run in the middle (check out the image below).
 The seam is running in the middle.
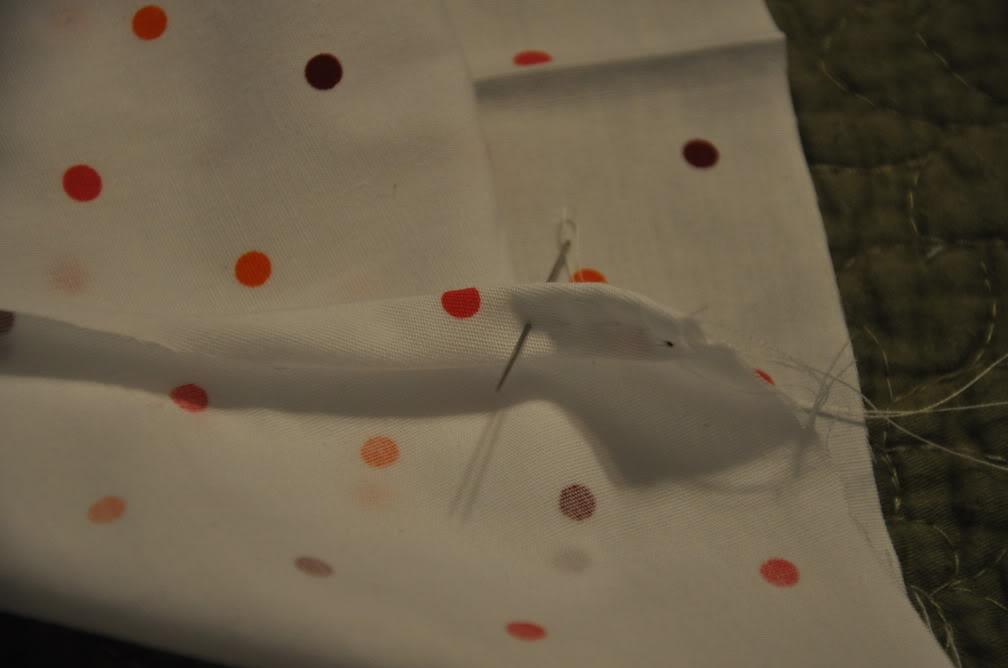
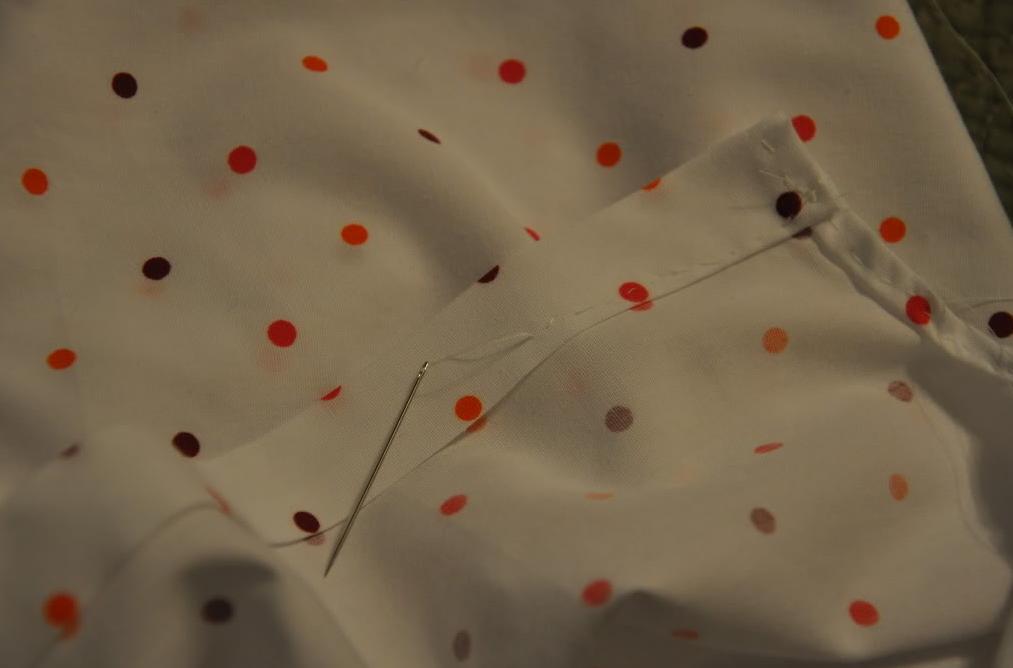
7. Now hem both the armholes. Ideally, I would recommend double-hemming
them, i.e., fold the sides in, and then fold them again to prevent the
dress from threading away.
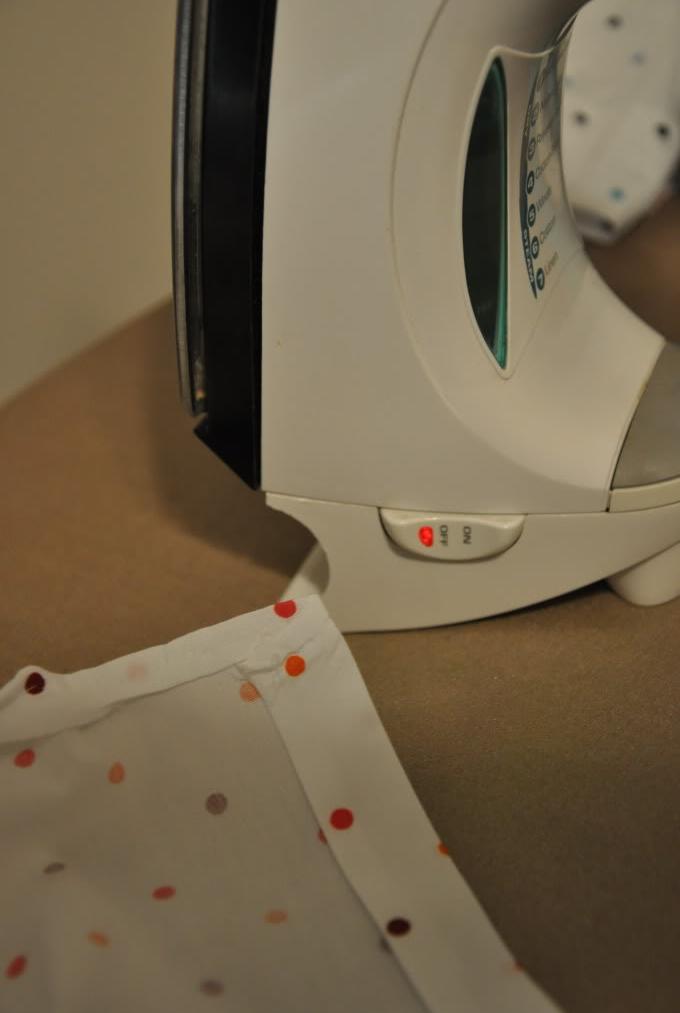 Use iron to mark the folds so that it becomes easier for you to hem.
8. Once you have hemmed both the armholes, hem the neck in the same manner – the only difference being that the hem of the neck would be larger as it will have a ribbon running through it. Remember to keep a hole at the edges so that ribbon can pass.
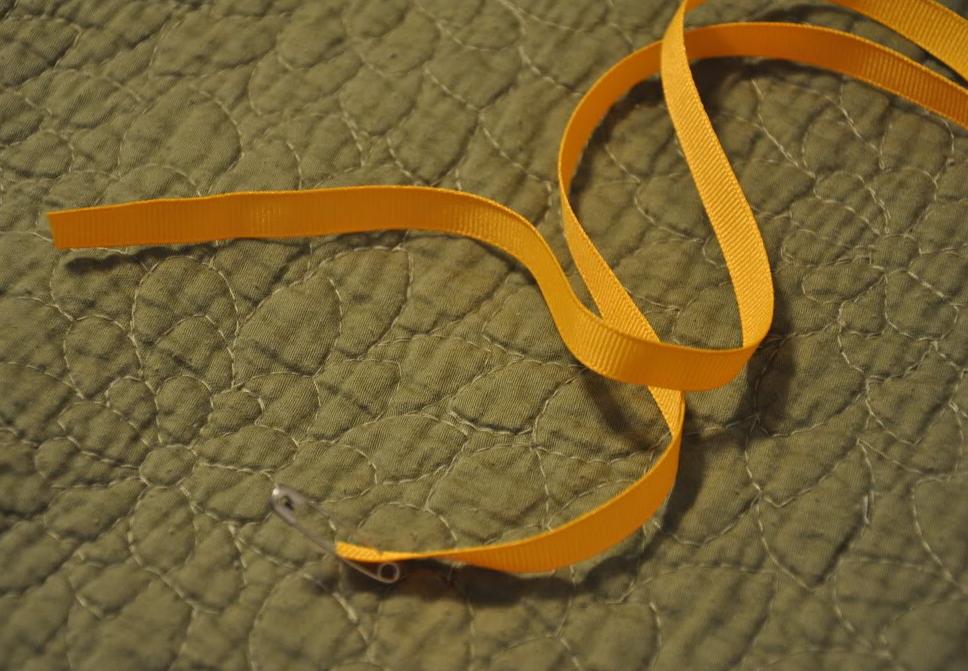
9. Now it is time to pass the ribbon through the neck-hem. Measure and cut two ribbons of the same length. Take one ribbon and pass it through the front hem - one sleeve to the other. Take the second ribbon and do the same for the back. A good tip is to use a safety-pin to pass the ribbon through the hem.
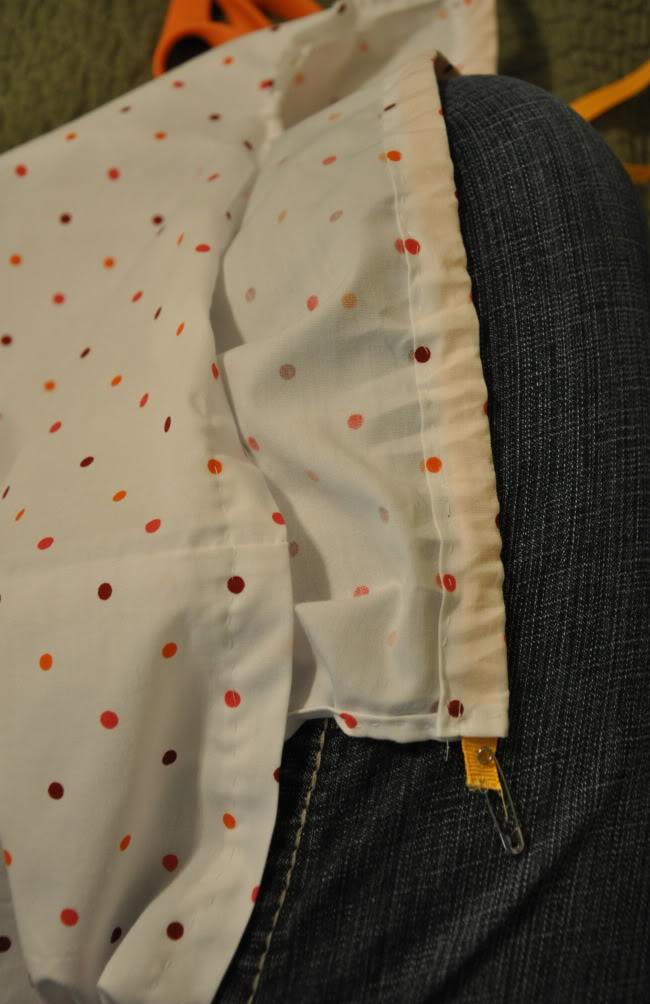
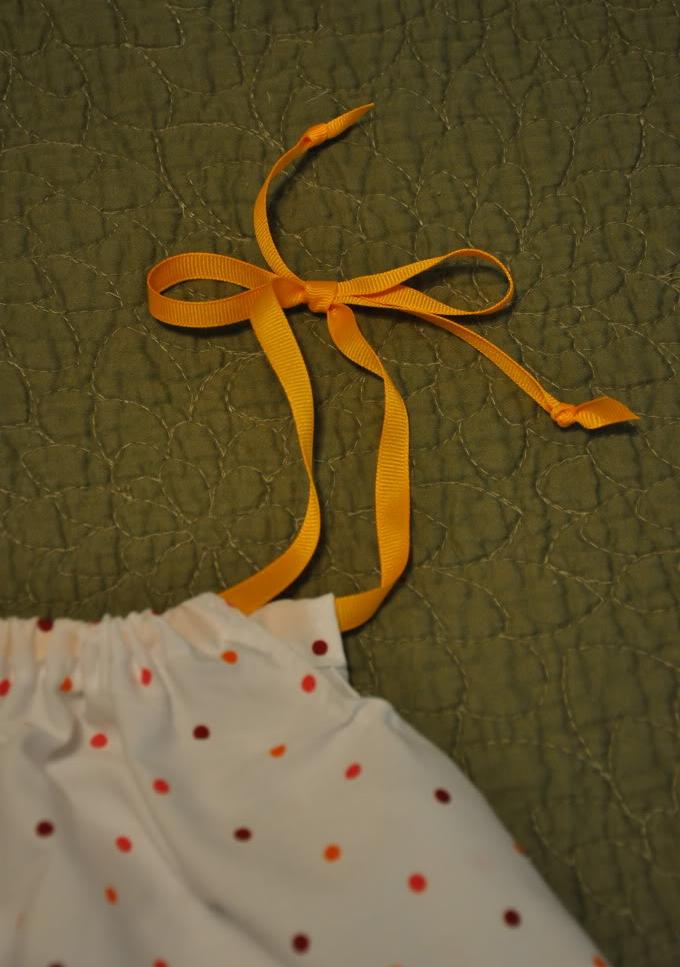
10. Knot the ends of the ribbons like shown in the picture.
TA DA !!! .... (drum rolls please!) Your pillowcase baby dress is ready!
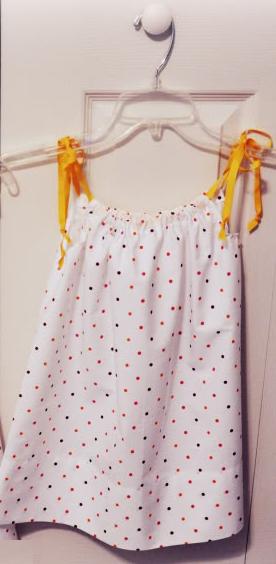
You can make several infant dresses like these, specially for summers, or gift one to a loved one's baby.
Wasn’t it fun? Newborn clothes do not take much of the pillowcase fabric and hence you can make a matching bow with the dress, or a scrunchy (for ponytail) with the left fabric. Now, you are a guru at making infant dresses in less than an hour!
Infant Dresses for Halloween
How about some super-easy Halloween dresses for your little ones? Here are dozens of step-by-step tutorials to making some cute & creative costumes:
Return to DIY Projects' section.
Return to Homepage.
Share YOUR Baby Dress story with us!
We would love to see what you created for your baby - and how you did it. Your contribution will become a separate webpage that you can share with your friends and family, and be proud of!
So what are you waiting for? : )

Recent Articles
-
With every newborn baby, a parent is also born!
Apr 25, 24 11:10 PM
 A Complete Guide to Raising a Healthy Newborn Baby...
 -
Disadvantages of Formula Feeding
Apr 09, 21 11:53 AM
 To get an idea about some challenges faced by formula feeding moms, keep in mind theses disadvantages of formula feeding:
 -
Choosing to Bottle Feed
Apr 08, 21 11:42 AM
 If you are choosing to bottle feed, here is all you need to know...
Wanna keep updated?
Sign-up for NewbornHub's monthly newsletter below:
New! Comments
Have something to say about what you just read? Leave me a comment in the box below :)