Nursery Room DIY:
Create Your Own Decoupage Tree
Last week I wrote about choosing the right color theme for your baby’s nursery room and before finishing up the article, I promised to share with you some nursery ideas on how to create your very own (and very easy) decoupage tree. So here I am – keeping up with the promise : )
In case you’re wondering, a decoupage craft is an art of decorating something by using the cut-outs of colored fabric or paper and then gluing these pieces to create something beautiful. Even if you think you are not the "creative kind" who could add zing to your baby nursery decor, you would be surprised to know how beautiful a decoupage tree you can build – right out of the imagination onto your baby nursery wall.
So put on your creative hat and get hold of your tools (err…scissors and glue) and let the craft begin!
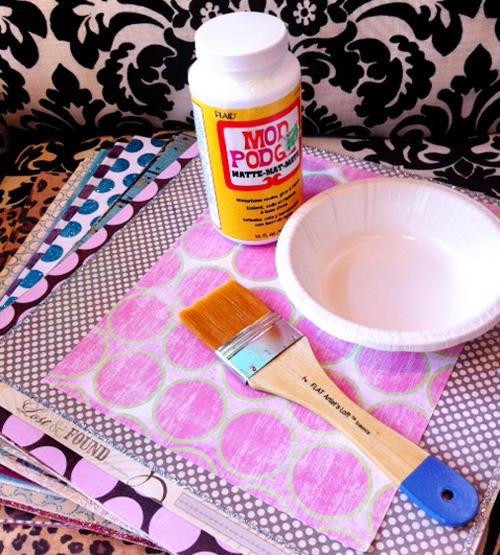
Things you will need:
You can come up with your own baby nursery ideas and customize this tree accordingly. The items I am listing below are for a 6 inch tree that we are making.
- Scrapbook paper (about 10 sheets) or fabric cut-outs
- Mod Podge glue (you can easily find that at a local craft store, stationary or paint shop) or super glue
- Scissors
- A wide paint-brush (go for a cheap one as you’ll probably throw it away later)
- A rough plate or bowl
- A stool or a nice sturdy chair which you can climb and move around with.
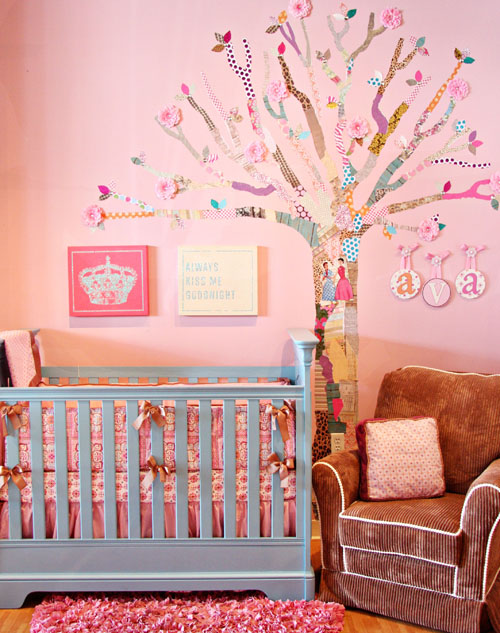
I recommend scrapbook papers because they are easy to manage. If budgeting is the issue, you can even use good quality gift papers (but not the thin ones as glue will make them thinner). Whatever you use, make sure it is available in different colors and designs – it’s the contrast that makes this tree stand out. Oh and the glittery ones will make the branches/ leaves sparkle! So if you have a paper cut-out that’s nice and thick and could be nicely pasted to form leaves or branches but you feel that it won’t go with the soft color of the nursery, don’t worry. Look closely at the decoupage tree here and think again! The contrasting pattern and colors make the art look so good!
Similarly, Mod podge glue is recommended but if you find it to be a little expensive, you can go for super glue.
Let's grow a lovely tree in your nursery room
Now that you have all the things you need, what are you waiting for? Shift your creativity to the nursery room wall!
Step 1:
Draw a rough sketch of the tree on a paper. This way you will know what you are going to make. There is no right way to make a tree - every tree is different. Similarly, the beauty and uniqueness of your decoupage tree will be in its different sized branches. You can gently mark (very light) dots to track the shape and spread of the tree.
Step 2:
Cut the scrapbook paper or fabric in pieces to form branches. If you are using different types of fabric, it will give a nice vintage feel due to its uneven edges. You can do the same with the paper by tearing them using hands and not using scissors.
Step 3:
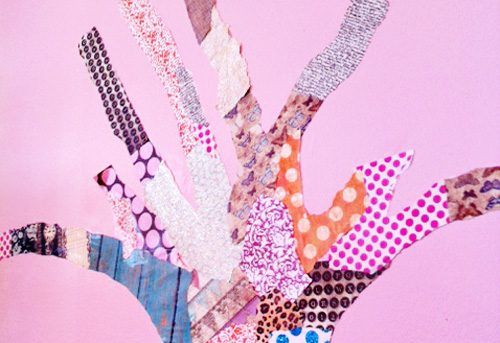
Start pasting!
Dip your brush in glue and start pasting the branches on the nursery room wall. The good thing about a Mod Podge glue is that when it dries, it becomes clear - so don’t worry if the glue spreads on the wall. Remember, the branches at the bottom would be thicker and as we reach the top of the tree, the branches will become thinner – as in a normal tree.
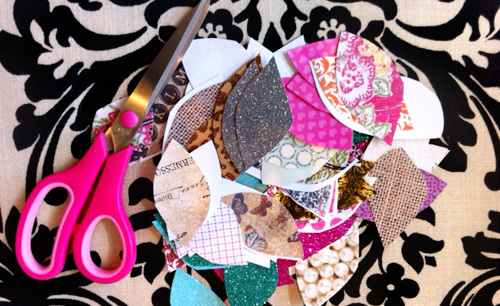
Step 4:
Once you are done with the branches, add leaves and flowers. Use the leftover paper or fabric from the branches. Use scissors and a sample leaf to cut almost identical leaves.
Use flowers from old hair-bands, clips, dresses and sweaters. You can also use bows and old brooches and stick them well using the glue. If you have an older daughter, go for the flowery clips that she has worn too often and now wants to get rid of. Alternately, you can create them at home using fabric, crepe paper or kite paper. You can also go for poster or magazine cuttings of flowers, but make sure your coat them with plastic tape (scotch tape) to make them look shinny. You may be surprised, while standing inside the nursery, how ideas keep popping up in your head.
Here’s a quick way to make paper or fabric flowers at home:
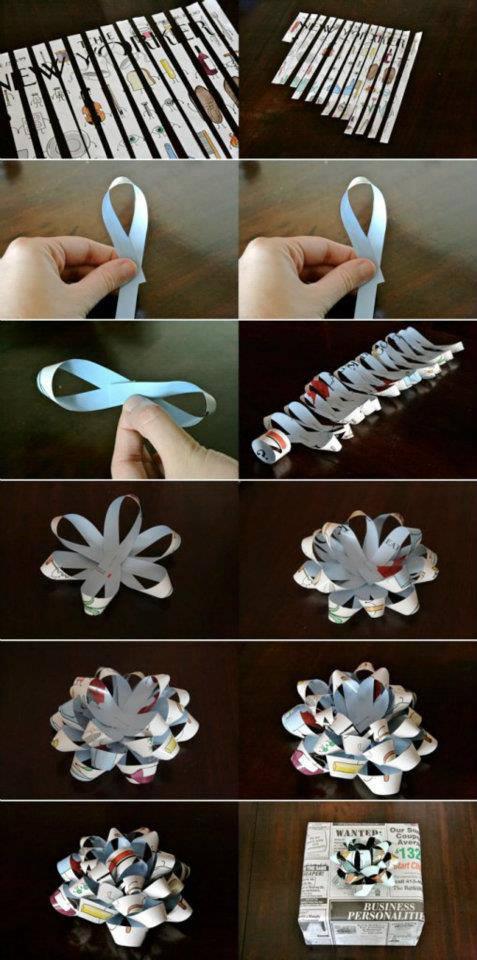
If you are not short of budget, you can purchase some identical flowers from the same place you got your scrapbook papers. They come in the form of packets and look adorable when you stick them on the wall.
Let’s see how our tree finally looks now:
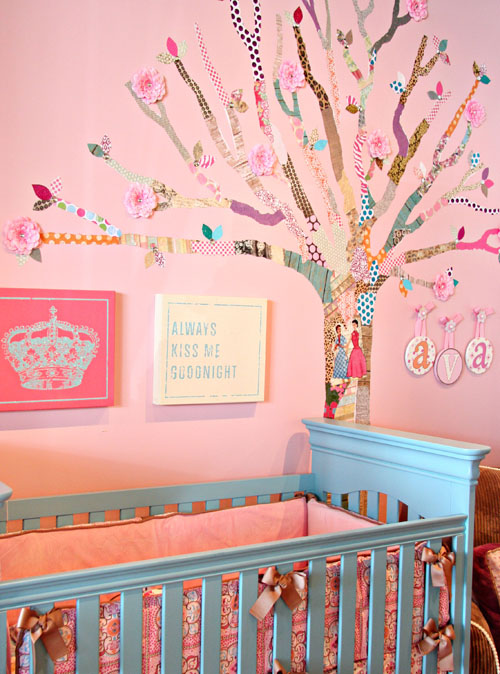
So how does your tree look? It will definitely make your baby's nursery room stand out. So let your imagination flow and your decoupage tree grow (I think there's a poet inside me;))
And yes, don’t forget to share your nursery room pic with us! (Hint: www.facebook.com/NewbornHub)
Happy crafting! : o )
Return from Creating Decoupage Tree in Your Baby's Nursery Room to Homepage.
Return to Baby Nursery section.

Recent Articles
-
Disadvantages of Formula Feeding
Apr 09, 21 11:53 AM
 To get an idea about some challenges faced by formula feeding moms, keep in mind theses disadvantages of formula feeding:
 -
Choosing to Bottle Feed
Apr 08, 21 11:42 AM
 If you are choosing to bottle feed, here is all you need to know...
 -
4 Ways on How to Clean Feeding Bottles
Apr 07, 21 01:37 PM
 Whether you are worried about how to clean feeding bottles at home or making sure they are sterilized while travelling, here is all you need to know:
Wanna keep updated?
Sign-up for NewbornHub's monthly newsletter below:
New! Comments
Have something to say about what you just read? Leave me a comment in the box below :)